 Azure Functions: Deploying a function
What is Azure Functions?
Azure Functions is a serverless compute service that lets you run event-triggered code without having to explicitly provision or manage infrastructure. A function is "triggered" by a specific type of event. Supported triggers include responding to changes in data, responding to messages, running on a schedule, or as the result of an HTTP request.
Usage
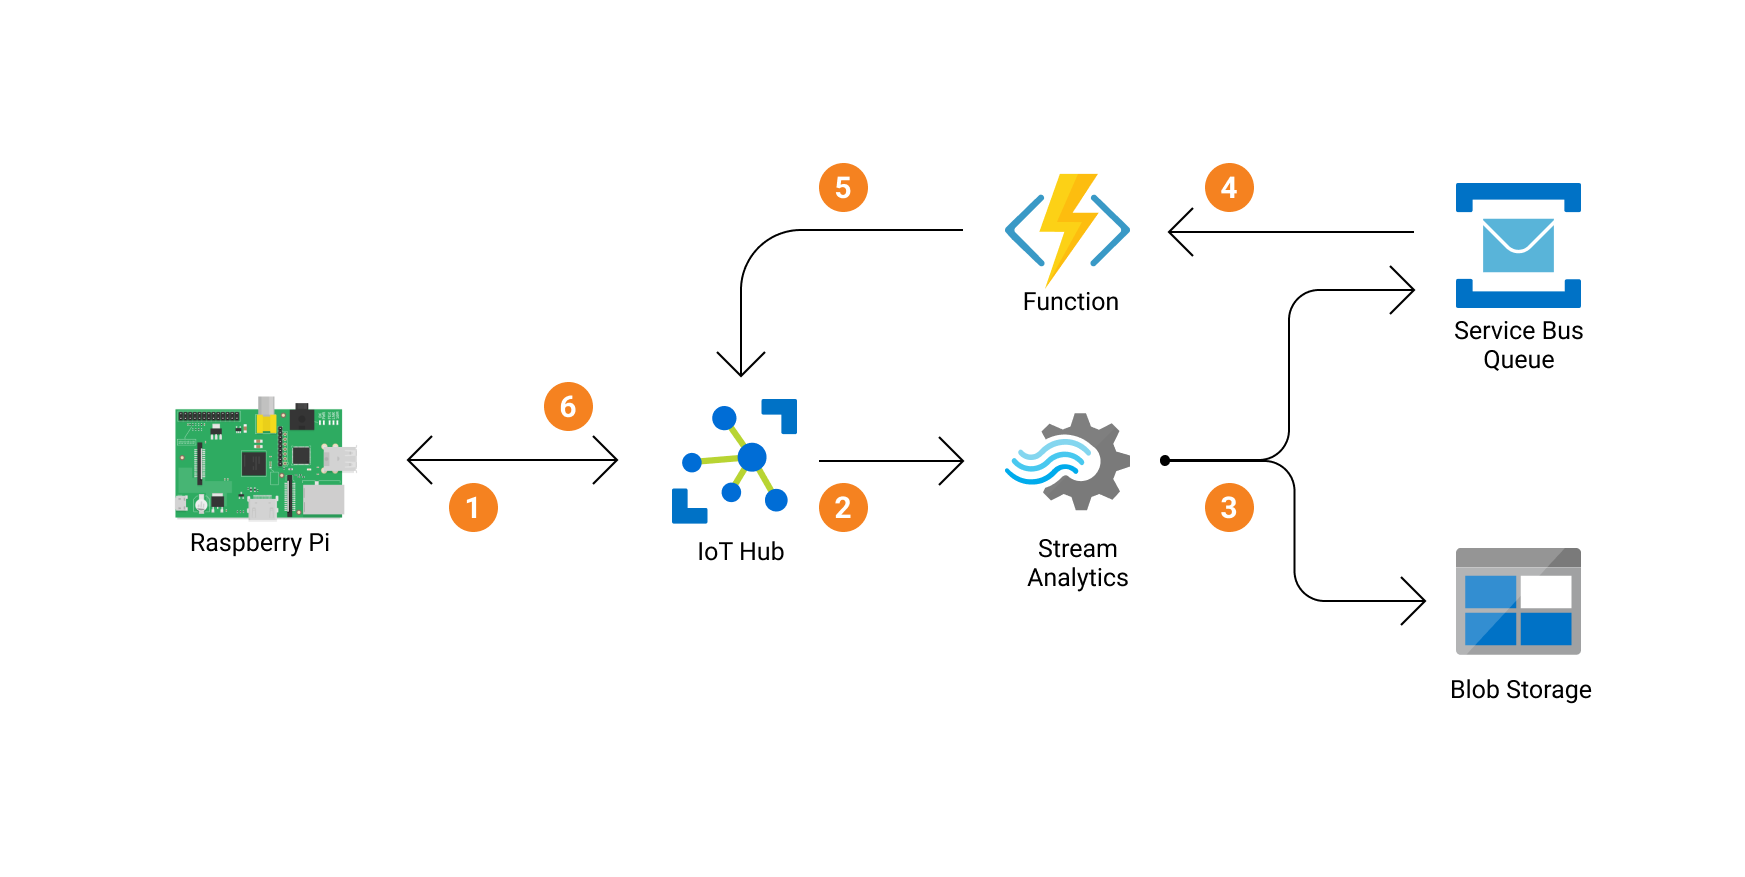
In our application, we're going to start a function when we receive a message on our Service Bus Queue. A function can be deployed within Azure Functions, and can be developed locally on your computer.
Prerequisites
- Make sure you have installed the Azure CLI on your computer
- Install the Azure Functions Core Tools v3 using installation instructions for your machine on the official documentation website.
- basic knowledge of git + python virtual environments
- access to a bash-like terminal
Downloading the repository
Clone this repository to your computer.
git clone https://github.com/sandervandorsten/azure-iothub-demo.git
# Cloning into 'azure-iothub-demo'...
# ...
# Resolving deltas: 100% ..., done.
Navigate into the git repository
cd azure-iothub-demo
Create a virtual environment with python 3.7 and install the requirements
virtualenv -p $(which python3.7) venv
source venv/bin/activate
pip install -r requirements.txt
Running our functions application locally
Now we have our code and python environment locally, we can test our function app locally before we deploy it to our cloud project.
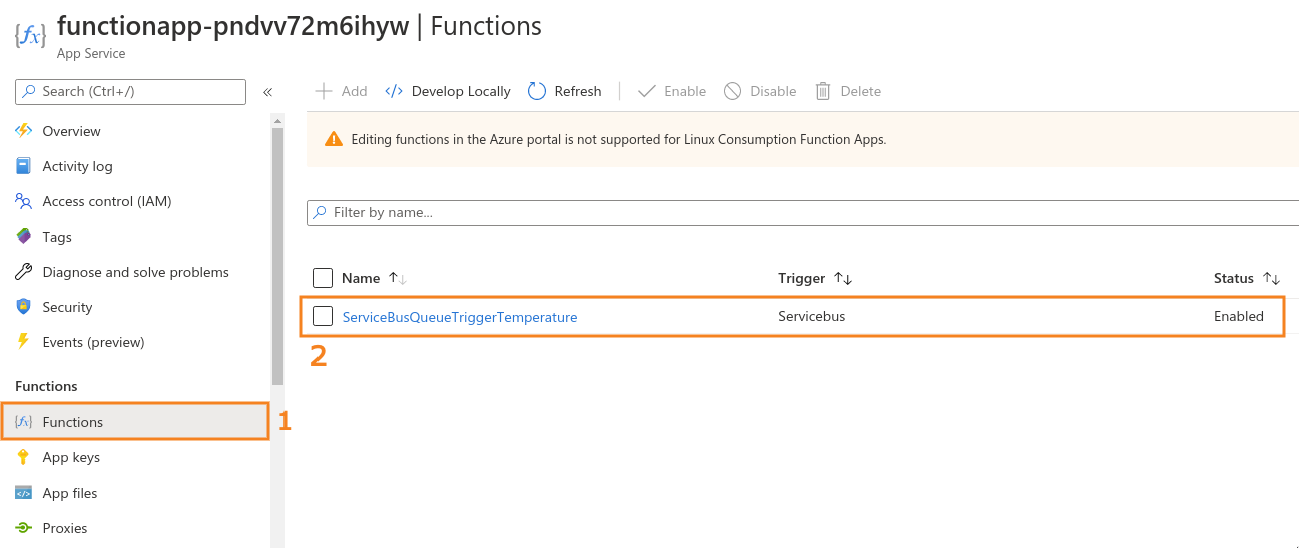
The code that will be run in the function can be found in src/azure_functions/ServiceBusQueueTriggerTemperature/__init__.py in this repository, you can check it out if you like.
To start our function app locally:
Navigate to the folder containing the source code for Azure Functions
cd src/azure_functions
src/azure_functions/local.settings.json.
Replace the functionapp-.... name
Remember that you should replace the functionapp name with your own!!
func azure functionapp fetch-app-settings functionapp-pndvv72m6ihab
# App Settings:
# Loading FUNCTIONS_WORKER_RUNTIME = *****
# Loading FUNCTIONS_EXTENSION_VERSION = *****
# Loading AzureWebJobsStorage = *****
# Loading connectionStringListenServiceBus = *****
# Loading connectionStringIotHub = *****
Start the function app locally. This will start a local webserver on port 7071. Our function should then run locally on your computer, but listens to the Service Bus Queue in the cloud.
func start
# Found Python version 3.7.5 (python3).

#                   %%%%%%
#                  %%%%%%
#             @   %%%%%%    @
#           @@   %%%%%%      @@
#        @@@    %%%%%%%%%%%    @@@
#      @@      %%%%%%%%%%        @@
#        @@         %%%%       @@
#          @@      %%%       @@
#            @@    %%      @@
#                 %%
#                 %
# ...
# Content root path: /.../azure-iothub-demo/src/azure_functions
# Now listening on: http://0.0.0.0:7071
# Application started. Press Ctrl+C to shut down.
Simulating a RaspberryPi Locally
Running our function app was the last step of infrastructure that we should enable before we can start testing our whole setup. Now, we need to connect a IoT Device to the IoT Hub s.t. we can send device-to-cloud telemetry towards our cloud application, and receive cloud-to-device messages from our function app.
I've created a Raspberry Pi Interface in azure-iothub-demo/src/iothub/device.py that we're going to use to simulate a Raspberry Pi. You can connect your own raspberry Pi to do the actual work, but this is (currently) beyond the scope of this tutorial.
To start a Raspberry Pi simulation, open an extra terminal window (leaving the one running the function app open!) and running the following snippets:
Configure the Raspberry Pi
Navigate to the azure-iothub-demo folder and activate the virtual environment in this terminal as well
source venv/bin/activate
sample.env file to .env file s.t. we can store essential credentials here later
cp sample.env .env
Save your unique IoT Hub name (see your own Azure Portal with the name of your Iot Hub resource) and DeviceId s.t. we can use them below
export IoTHubName="rpi-iothub-........."
export deviceId="MyRaspberryPi"
An alternative way of interacting with the cloud is through the Azure CLI. Download the Azure CLI IoT Hub Extension to interact with your cloud application from the terminal. In this way, we don't have to access the Azure Portal and click through it.
az extension add --name azure-iot
Access the connection string for the IoT Hub in your terminal
az iot hub show-connection-string \
  --name $IoTHubName \
  --output table
#HostName=rpi-iothub-pndvv72m6ihab.azure-devices.net;SharedAccessKeyName=iothubowner;SharedAccessKey=BhkccChKy2ii4SdlXw00/1NtD0p6nssS0MIHoWqZODI=
az iot hub device-identity show-connection-string \
  --hub-name $IoTHubName \
  --device-id $deviceId \
  --output table
#HostName=rpi-iothub-pndvv72m6ihab.azure-devices.net;DeviceId=MyRaspberryPi;SharedAccessKey=bHnH82Pn21X0QPVkrFCban/XTEml5zAVR8YkiccgZPQ=
Now, open the .env file with a text editor and replace the string values s.t. it looks like this
DEVICE_ID="MyRaspberryPi"
CONNECTION_STRING_IOT_DEVICE="HostName=rpi-iothub-pndvv72m6ihab.azure-devices.net;DeviceId=MyRaspberryPi;SharedAccessKey=bHnH82Pn21X0QPVkrFCban/XTEml5zAVR8YkiccgZPQ="
CONNECTION_STRING_IOT_HUB="HostName=rpi-iothub-pndvv72m6ihab.azure-devices.net;SharedAccessKeyName=iothubowner;SharedAccessKey=BhkccChKy2ii4SdlXw00/1NtD0p6nssS0MIHoWqZODI="
.env file
This file contains credentials and should not be shared, or stored publicly!
Starting the Raspberry Pi
Now the configuration is finished, you can start the RaspberryPi simulation. the Simulated Raspberry Pi will:
- send a random temperature value every 3 seconds to the IoT Hub.
- listen to it's IoT Hub for messages. Our function app will send messages to the device through the IoT Hub to start the fan if
temperature > 29(as configured in our Stream Analytics Job). The fan will then be turned on for 10 seconds, and deactivated afterwards. Hence, if the temperature will stay above 29 degrees, the fan will stay on because the RaspberryPi will keep receiving messages to turn on the fan.
Navigate to the iothub folder and run the Raspberry Pi simulation
cd src/iothub
python main.py --RPi SimulatedRaspberryPi
# IoT Hub device sending periodic messages, press Ctrl-C to exit
# Sending message: {"temperature": 33.794175910136936, "fan_active": false}
# Message sent
# Sending message: {"temperature": 22.667180109040924, "fan_active": false}
# Message sent
# ...
Once the Raspberry Pi sends a message with a temperature > 29, this message will be forwarded by the Stream Analytics Job to the Service Bus Queue. Once this message arrives on the Service Bus Queue, it will trigger the Function app (that is running locally on your computer), which sends a message through the IoTHub to the device that the fan should be activated. The logs in your (other) terminal of your function app should look something like this:
[7/14/2020 9:53:43 AM] ...
[7/14/2020 9:53:43 AM] Executing 'Functions.ServiceBusQueueTriggerTemperature' (Reason='New ServiceBus message detected on 'temperature'.', Id=161614bf-3d3a-40f7-8608-7e2c88d08ba0)
[7/14/2020 9:53:43 AM] Trigger Details: MessageId: a5f9ddcd698142e495a1cec97f954071, DeliveryCount: 10, EnqueuedTime: 7/14/2020 9:53:42 AM, LockedUntil: 7/14/2020 9:58:43 AM, SessionId: 18725
[7/14/2020 9:53:43 AM]  INFO: Received FunctionInvocationRequest, request ID: 2f46689a-8f66-4dab-88da-6381e553e3f2, function ID: 4065367e-45d4-45f3-bb6e-416b2fdeed51, invocation ID: 161614bf-3d3a-40f7-8608-7e2c88d08ba0
[7/14/2020 9:53:43 AM] Python ServiceBus queue trigger processed message: {'temperature': 30.463195551136046, 'fan_active': 1, 'EventProcessedUtcTime': '2020-07-14T09:53:36.6114953Z', 'PartitionId': 1, 'EventEnqueuedUtcTime': '2020-07-14T09:53:36.5600000Z', 'IoTHub': {'MessageId': None, 'CorrelationId': None, 'ConnectionDeviceId': 'MyRaspberryPi', 'ConnectionDeviceGenerationId': '637298794990585953', 'EnqueuedTime': '2020-07-14T09:53:36.0000000', 'StreamId': None}}
[7/14/2020 9:53:43 AM] Device Method called
[7/14/2020 9:53:43 AM] Device Method name       : start_fan
[7/14/2020 9:53:43 AM] Device Method payload    : {}
[7/14/2020 9:53:43 AM] Response status          : 200
[7/14/2020 9:53:43 AM] Response payload         : {'Response': 'The fan has been (re)activated at 2020-07-14 11:53:43.095383'}
[7/14/2020 9:53:43 AM] ...
Summary
You should now have two terminal windows open. One with a locally running function app, and one with a Simulated Raspberry Pi. Messages should be flowing back and forth between the services.
Debugging
If this is not the case:
- Check if your
.envfile is configured correctly s.t. your Simulated Raspberry Pi can send data to the cloud. - Make sure your Stream Analytics Job is running (see: Starting the analysis job on Stream Analytics)
-
Verify if messages are received on the cloud by checking
- if data is written to the storage account container named
temperature. This should contain one or multiple jsonfiles with data from the Raspberry Pi. - if messages are sent to the Service Bus Queue. You can navigate in the Azure Portal to the Queue and look if there are messages in the Queue.
Empty Service Bus Queue
Remember that if your function app is running (locally), it will consume all messages on that queue instantly, hence the queue will become empty almost instantaniously whilst the function app is running.
- if data is written to the storage account container named
Deploying your function app to Azure
Now your function app is tested locally, you can deploy it to Azure. You can stop the services in both terminals.
Deploy the function to Azure. (replace the function app name with your own)
func azure functionapp publish functionapp-pndvv72m6ihab
Recap
- You have configured and tested a pre-built Azure Function to work on your local machine.
- You have deployed this function to the cloud using the python library for Azure Functions.
- You have Simulated a Raspberry Pi and have sent/received data from and to the cloud.
Next Steps
Now our infrastructure is fully deployed you can use a real or simulated Raspberry Pi to send data to the cloud. If you're creative, you can start extending this infrastructure if:
- You want to create a dashboard with PowerBI, you can add PowerBI as an output to Stream Analytics
- You want to register more IoT devices to IoT Hub