Deploying Infrastructure
Prerequisites
- Azure account with a subscription you are allowed to create resources in (Free Trial Subscription should do)
- Make sure you have installed the Azure CLI on your computer
- basic knowledge of git + python virtual environments
- access to a bash-like terminal
Deploying Infrastructure
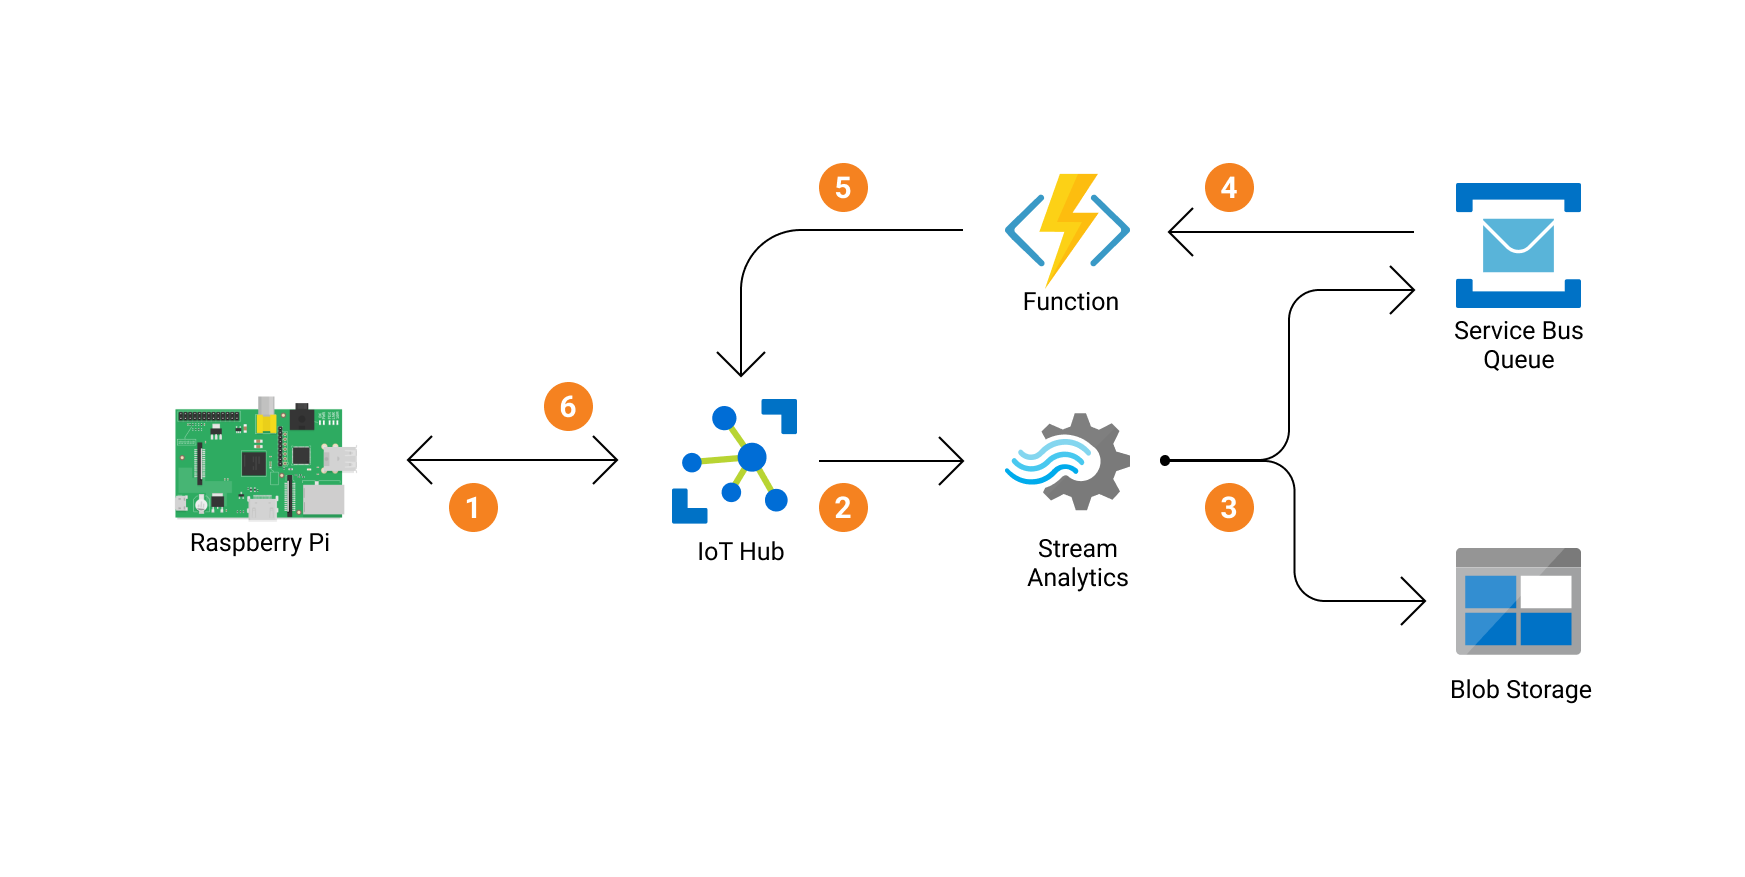
I've defined the infrastructure in an ARM template. This allows you to press the button below and deploy the infrastructure to your own Azure account with the click of a button.
- Press the 'Deploy to Azure' button above to create a custom deployment in Azure
- Login to your Azure Account where you want to create the application (if not logged in yet)
- You should then see the Custom Deployment screen as in the screenshot below. Here you can specify some settings for the Deployment.
- Select a subscription in which you want to create the resources in
- Create a new resourcegroup in which you want to deploy these resources
- Keep all the other settings as default, unless you know what you're doing and want to change something
- Scroll down, accept the terms and conditions and click Purchase.
- IMPORTANT Remember that this deployment and the running of it will cost you money. For me, I didn't pay more that a few euros and I let it run for a month or so. Please remember to remove your resources if you're not using them anymore!
- After a couple of minutes (+- 5 minutes I guess) your infrastructure deployment should be completed. Navigate to the resource group you've created to see the different services you've deployed.

Next Steps
Now you have deployed your infrastructure, we can start and configure the different services that we're going to need to run our application.